
 On Windows, data sources are stored in the Windows Registry. You can configure and modify data sources through the ODBC Administrator using a driver Setup dialog box, as described in this section.
|
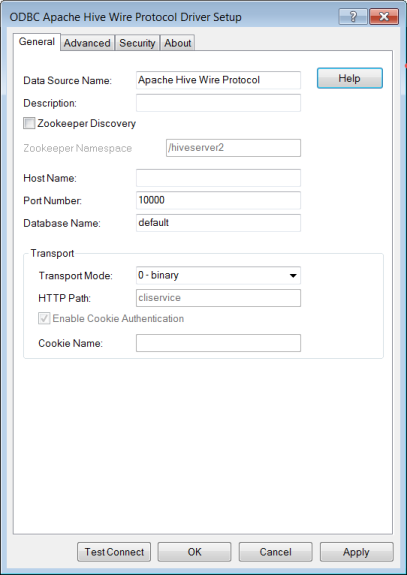
Connection Options: General
|
Description
|
|
Specifies the name of a data source in your Windows Registry or odbc.ini file.
Default: None
|
|
|
Specifies an optional long description of a data source. This description is not used as a runtime connection attribute, but does appear in the ODBC.INI section of the Registry and in the odbc.ini file.
Default: None
|
|
|
Determines whether the driver uses Apache ZooKeeper when connecting to a database server.
If disabled, the driver does not use ZooKeeper when connecting to a database server. By default, the driver's behavior is determined by the connection options settings.
If enabled, the driver attempts to connect to the member servers of a ZooKeeper ensemble that are specified by the Host Name connection option. At connection, the driver retrieves configuration information from the ZooKeeper service that determines the behavior of the driver for the connection. The retrieved configuration information takes precedent over any values specified using connection options.
Default: Disabled
|
|
|
Specifies the name of the Apache ZooKeeper name space to which you want to retrieve configuration information.
Default: /hiveserver2
|
|
|
The name or the IP address of the server to which you want to connect.
When Apache ZooKeeper support is enabled (ZooKeeperDiscovery=1), this option specifies a comma-seperated list of member servers of the ZooKeeper ensemble to which you want to connect. For example:
server1:10000,255.125.1.11:2818,server3:2828
Default: None
|
|
|
Specifies the port number of the server listener.
Default: 10000
|
|
|
Specifies the name of the Hive database. The database must exist, or the connection attempt will fail.
Default: default
|
|
|
Specifies whether binary (TCP) mode or HTTP mode is used to access Apache Hive data sources.
If set to 0 - binary, Thrift RPC requests are sent directly to data sources using a binary connection (TCP mode).
If set to 1 - HTTP, Thrift RPC requests are sent using HTTP transport (HTTP mode). HTTP mode is typically used when connecting to a proxy server, such as a gateway, for improved security, or a load balancer.
Default: 0 - binary
|
|
|
Specifies the path of the HTTP/HTTPS endpoint used for connections when HTTP mode is enabled (TransportMode=1).
Default: cliservice
|
|
|
Determines whether the driver attempts to use session cookie based authentication for requests to an HTTP endpoint after the initial authentication to the server. Cookie based authentication improves response time by eliminating the need to re-authenticate with the server for each request.
If disabled, the driver does not use cookie based authentication for HTTP requests after the initial authentication.
If enabled, the driver attempts to use cookie based authentication for requests to an HTTP endpoint after the initial authentication to the server. The cookie used for authentication is specified by the Cookie Name option.
Default: Enabled
|
|
|
Specifies the name of the cookie used for authenticating HTTP requests when HTTP mode (TransportMode=1) and cookie based authentication are enabled (EnableCookieAuthentication=1).
Default: If no value is specified, the driver attempts to use the following cookie names by default:
|