Try OpenEdge Now
skip to main content
Alerts Guide and Reference
Alerts Setup and Maintenance : Accessing alert information from the command line : Using the alertlist command with additional options
 

Using the alertlist command with additional options

The following table describes the additional options -detail and -verbose.
Note: Unlike the group selection options highlighted in Table 7, the -detail and -verbose options will be processed regardless of the position in which you enter them on the command line.
Table 8. Alert list command options to display additional details 
Option syntax
Purpose
How to use
-detail
To format the display to provide a block of information about the alert, shown in the command line.
The block of information matches what you see when you display the alert in the console. See Table 9 for a summary of the alert list details.
Provide the -detail option along with the option whose alert information you want to see listed.
-verbose
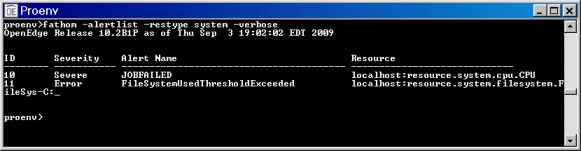
To change the resource column of the displayed alerts from the generic format AdminServer:resource name to the fully qualified resource key.
See Figure 16 to see an example of how to use the -verbose option.
Provide the -verbose option along with the option whose alert information you want to see listed.
Figure 16 identifies a command line that generates a group selection based on the -restype option that also includes the -verbose option. Note that the resource name, listed in the Resource column, specifies the fully qualified resource key. A fully qualified resource key is the most complete reference to a resource. The default format for a fully qualified resource key identifies each resource by its AdminServer name, the resource category to which the resource belongs, and the specific resource type and associated resource name.
In Figure 16, the fully qualified resource key information identifies localhost as the AdminServer, the resource category as system, and the specific cpu resource name as CPU.
Figure 16. -restype group option with verbose option results
Note: The AdminServer name localhost is logically the same as the AdminServer name for the system where OpenEdge Management is installed and running.
Use the fully qualified resource key to:
*Ensure that you are not confusing one resource name with another one that is either identical or similar. For example, it is possible to confuse a wsbroker1 on one AdminServer with another wsbroker1 on a different AdminServer. Referencing a resource by its explicit fully qualified resource key eliminates confusion as to what resource you are working with.
*Provide easy access to the complete resource information. You can cut and paste the fully qualified resource key into the command line when you use the -resource group option.
Note: Due to the use of the colon in the fully qualified resource key between the AdminServer name and the resource category information, this format might need to be put in quotation marks on UNIX systems.
The following table lists the details that can appear in the alert list.
Table 9. Alert list details
Name
Description
Alert ID
The number given to the alert.
Alert name
The name of the alert.
Alert severity
Whether the alert is considered an error, a warning, or informational or severe in nature.
Alert message
The content of the alert message; for example, notification that the Database Resource known as the OpenEdge Management Trend Database has been enabled.
Alert count
The number of times the alert has occurred.
AdminServer
The name of the AdminServer to which the resource belongs.
Resource
The name of the resource; for example, OpenEdge Management Trend Database.
Last fire date
The time and date when the alert was last fired.
First fire date
The time and date when the alert was first fired.
Has been seen?
Whether the alert has been seen yet (either true if it has been seen or false if it has not been seen).
Seen by
If the alert has been seen, the name of the user who saw it. (If the alert has not been seen, the Seen by field does not appear.)
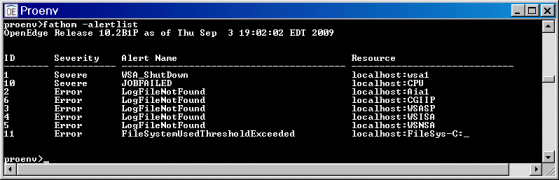
Examples

Enter the following command to see a list of existing OpenEdge Management alerts from the command line:
fathom -alertlist
Information about the current alerts appears, as shown below.
Figure 17. -alertlist in the command line
In Figure 17 there are eight alerts across a number of resources. As identified in the Resource column, all of these resources are on the localhost AdminServer. The alert ID numbers (ID) and severity (Severity) are also provided.
Enter the following command for a list of alerts for all OpenEdge server resources:
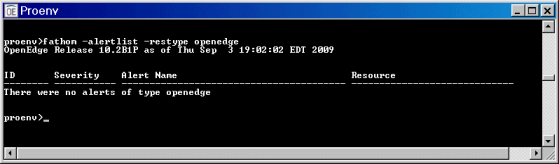
fathom -alertlist -restype openedge
You see any alerts that exist for any OpenEdge server resources (openedge) listed. If there are no existing alerts, you receive the message shown below.
Figure 18. -alertlist for openedge resource type
To see specific details about the alerts that exist for system resources, use either the -detail option or the -verbose option.
Enter the following command to examine the results of using the -detail option:
fathom -alertlist -restype system -detail
The details appear, as shown below.
Figure 19. -alertlist command used with -detail option
Enter the following command to examine the results of using the -verbose option:
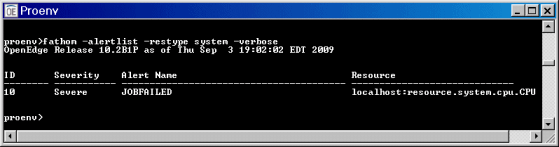
fathom -alertlist -restype system -verbose
The details appear, as shown below.
Figure 20. -alertlist command used with -verbose option