To compile and run an ABL class or procedure that instantiates a .NET class or references any .NET object type, ABL must be able to identify and locate the assembly where the specified .NET object type is implemented. For any ABL application that accesses .NET objects, the AVM automatically loads certain .NET assemblies, including the appropriate versions of:
Progress.NetUI.dll — The assembly where all custom OpenEdge .NET classes reside
Mscorlib.dll — The assembly where all core Microsoft .NET classes reside
System.Windows.Forms.dll — The assembly where all Microsoft form and control classes reside
System.Drawing.dll — The assembly where all Microsoft graphics classes reside
ABL can therefore locate any .NET type that you reference from these assemblies without any further work on your part.
However, for any .NET type that you reference that is not in one of these assemblies, you must explicitly identify the appropriate assembly to ABL using an assembly references file. This XML file, named assemblies.xml, is required to compile and run your application. This file must appear either in your working directory (the top-level directory for each project in Progress Developer Studio for OpenEdge) or in the directory you specify using the Assemblies (–assemblies) startup parameter. Progress Developer Studio for OpenEdge provides an Assemblies dialog in the project properties dialog box (click Properties > Project) and a separate Assembly References tool to create and edit assembly references files, as you require.
To create and edit an assembly references file using the Assembly References tool:
1. Run the Assembly References tool in one of the following ways:
In Progress Developer Studio for OpenEdge, click Assembly References on the Tools > OpenEdge menu.
In the Procedure Editor, click Assembly References on the Tools menu.
On a Proenv command line, enter the proasmref command.
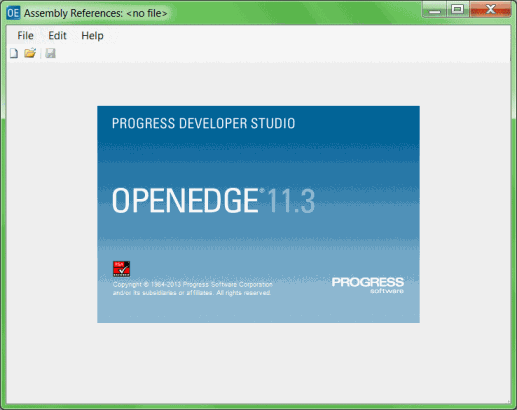
The utility opens, as shown:
2. To create a new assembly references file, select File→ New from the menu bar or click the New icon on the toolbar. An Assembly References screen appears:
A Global Assemblies tab displays a list box that you can filter, which shows all assemblies that are currently registered in the .NET Global Assembly Cache (GAC). All Microsoft .NET assemblies in the .NET Framework are installed in the GAC, as are most third-party assemblies that you might install, including the Infragistics assemblies that support the OpenEdge GUI for .NET. If you create or otherwise obtain a .NET assembly that is not registered in the GAC, you can access its DLL or EXE file using the Local Assemblies tab, which allows you to browse all the files on your system, with or without filtering.
3. On the Global Assemblies tab, you might first scroll to the Infragistics4.Win.Misc.v13.1 assembly and add it by selecting the assembly and clicking the Add button. The version of Infragistics reads 13.1.20131.2015. The selected assembly (Infragistics4.Win.Misc.v13.1) appears in the Assembly References list box below the Global Assemblies tab. Note that there might be multiple versions of the assembly listed in the displayed GAC. For a .NET Framework assembly, you typically select the latest assembly version that is supported by the .NET Framework version, in turn, supported by your release of OpenEdge (see Generalcapabilities and limitations). Otherwise, you must ensure that you are using the appropriate version of any assembly that you select for your application.
Note: You can add multiple assemblies at one time by scrolling to and group-selecting the assemblies you want to add before clicking the Add button.
4. When you have added all the assemblies that you need, you can save the file to a location on your PROPATH by choosing the File→ Save or File→ Save As menu item. Once a new file is saved, the filename replaces <no file> in the title bar.
Note: The Assembly References tool allows you to save an assembly references file by any filename you choose, and you might use different working filenames or store assemblies.xml files in different directories to manage assembly references required by different applications or application versions. However, ABL only recognizes and loads the assemblies.xml file that is in your current working directory or as in the directory specified by the –assemblies startup parameter.
You can also open an existing assembly references file to view or edit by choosing the File→ Open menu item, or you can create another new file by choosing the File→ New menu item. In either case, the tool checks to make sure you have saved any unsaved changes to the current file before proceeding.
When editing a file, you can remove assemblies in much the same way that you add them, by selecting them in the bottom panel and clicking Remove, or by double-clicking the assembly you want to remove. In this case, the selected assembly disappears from the bottom list box.
Note: You can remove multiple assemblies at one time by scrolling to and group-selecting the assemblies you want to remove in the bottom panel before clicking the Remove button. In this case, all the selected assemblies disappear from the panel.
For more information on the options of the Assembly References tool, see the tool's online help.
As noted, you need an appropriate assembly references file for both compiling and running ABL code that references .NET types. This means that you must also deliver the assembly references file with any OpenEdge GUI for .NET application that you deploy. For more information on GUI for .NET application deployment, see OpenEdge Deployment: Managing ABL Applications.