You can map a single object multiple times by extracting a new table from an existing relational table. In effect, you are adding the same table to your schema under a new name. Any subsequently named table will refer to the same native object as the original table.
Note: For instructions on how to add columns, see Adding Columns for details.
Take the following steps to extract a new table:
1. Navigate to the Schema Tool's main display.
2. In the Available Schemas panel, right-click the table you want to add to your schema under a new name, and select Extract New Table.
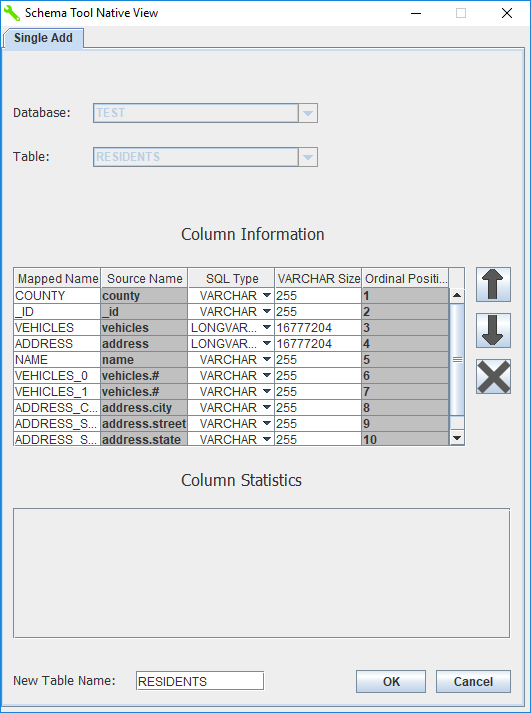
The Schema Tool Native View window appears. In the Column Information pane, you can view the columns associated with the table you are adding to the schema.
3. If you want to remove a column from your new table, select the column in the Column Information pane; then, click the Remove Column button . Repeat this step for any additional columns you would like to remove.
4. Optionally, define your columns in the Column Information pane. From this pane, you can rename columns, change a column's data type, change data type parameters (if applicable), and change the order in which columns appear in a table. See Defining Columns for details.
5. In the New Table Name field, type a unique name for the table. Then click OK. A confirmation message will be displayed. Click OK again.
6. In the left-hand panel, check the schema to ensure that the new table has been added. To save your work, click the Save button or select File > Save.
A table has been added to your relational schema, and the modified schema has been saved. Your SQL-based applications can use the name of the newly mapped table when running queries against the modified schema.

 . Repeat this step for any additional columns you would like to remove.
 or select File > Save.