Your native data source may not enforce consistent data types. Therefore, you may need to define column data types to ensure data integrity as you build a relational map of your data. The DataDirect Schema Tool allows you to define a schema by letting you define column data types and specify the order in which columns appear.
The following steps illustrate how you can define columns and specify the order of columns through the Client Information pane.
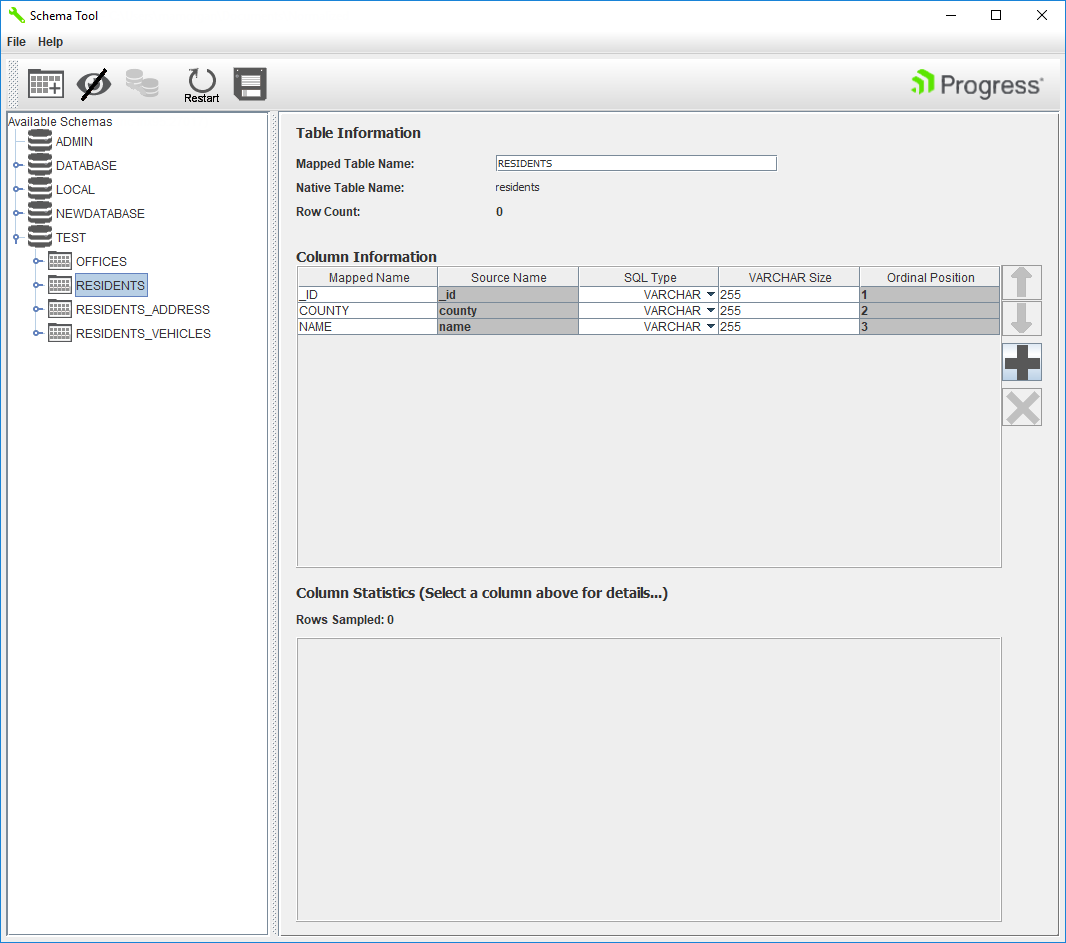
1. Navigate to the main display. You can access the Column Information pane in one of the following ways:
If you want to define columns for an existing table, click the table that contains the columns you want to define.
If you want to define columns when extracting a new table, right-click on a table you want to add to your schema under a new name, and select Extract New Table. See Extracting a New Table for general information on extracting tables.
This is a view of the Column Information pane from the main display.
2. To change a column's name, double-click the Mapped Name field and enter the new name for the column.
3. To change a column's data type, click the column's SQL Type field and select an alternative data type from the drop-down list.
4. To change the size or length of applicable data types, double-click the column's VARCHAR Size field and enter the desired value.
5. To reorder columns, select the column you would like to reposition. Use the up and down arrows to move the selected column left or right in the table.
Note: By default, columns are ordered left to right in the order in which they are discovered by the Schema Tool.
6. Save your changes from the main display. Click the Save button or select File>Save to save the modified schema.

 or select File>Save to save the modified schema.