When you add a column to a table, you are mapping the field of the native data source to your relational schema. The functionality described here is intended to be used when you want to map a field that does not appear in your relational schema. (It should not be used for duplicating or renaming a column that is already present in your schema.) Take the following steps to add a new column to your schema.
Note: You can map or add objects, including columns, to your relational schema in other ways. See Mapping Native Objects in a Schema for details.
1. Open the Add Column window in either of the following ways:
From the Available Schemas panel, right-click the table and select Add Column.
If you have the table you are modifying selected, you can click the Add Column button
.
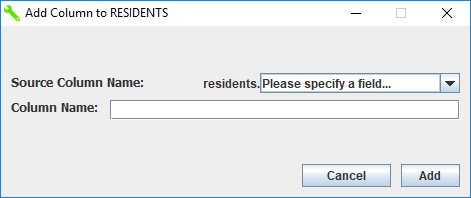
The Add Column window appears.
2. Enter the name of the native field you want to add as a column, or select it from the drop-down list. The name of the native field is case-sensitive.
Note: You can add fields that were not initially discovered by the Schema Tool. In this scenario, the name of the native field will not be available in the drop-down list, and you will have to enter the correct name in the Source Column Name field. When adding array elements, you will need to add not only the name of the element but also its index value. When indexing array elements, the element in the first position is indexed as 0, the element in the second position as 1, the element in the third position as 2, and so on. For example, the object Coordinates is an array in which the first element is the longitude and the second element is the latitude. In this case, you could specify Coordinates.0 as the source column whose column name is Longitude, and you could map Coordinates.1 to a column name of Latitude.
3. Enter a name for the column and click Add.
The Schema Tool returns to the main display. The native field now appears as a column in the table.
4. Click the Save button or select File>Save to save the modified schema.

 .
.
 or select File>Save to save the modified schema.