The ProBindingSource Designer allows you to define the schema of a data source in a number of ways. You can:
Manually define each table and table column
Import the schema from an ABL file or a schema definition (XSD) file
Import schema information from a connected database
In this exercise, you will import schema from the Customer and Salesrep tables of the sports2000 database. (For an example of using an XSD file, see Adding the ProBindingSource control to a form.)
To define the schema in the ProBindingSource Designer:
1. If the ProBindingSource Designer is not already open, right-click on bindingSource1 and choose ProBindingSource Designer.
2. Click the Import Schema from Connected Database icon on the toolbar
The database schema appears in the Available Schema pane on the ProBindingSource Designer dialog. The AvailableSchema pane allows you to select schema information from the tables and table columns of databases that are connected to the project.
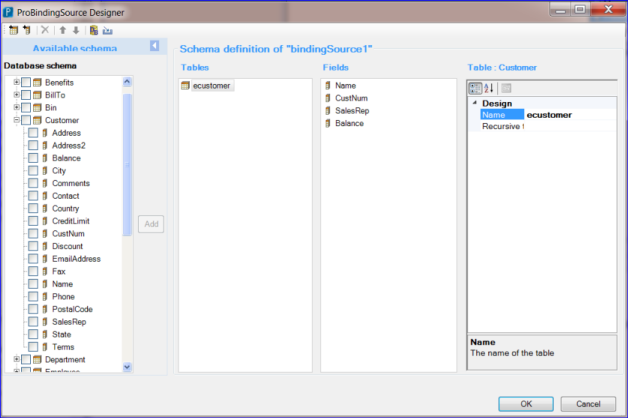
3. Expand the sports2000 node and the Customer node in the Schema Selection dialog, as shown in the following illustration:
4. Select the table columns Name, CustNum, SalesRep, and Balance.
5. Click Add. The selected Customer table appears in the Tables pane. The table columns appear in the Fields pane.
Note: You can change the order of the table columns in the Fields pane, using Move Selection Up and Move Selection Down icons on the toolbar.
6. Select Customer from the Tables pane and change its name to ecustomer, as shown in the following illustration:
Note: Although sports2000 is the ultimate source of data for the sample application, the data is delivered at run time from business entities through a service layer. In this project, the immediate source of data is the temp-table ecustomer, which has the same schema as the Customer table in sports2000. All this is implemented in the SampleApp/openedge/tutorial/services folder that you downloaded.
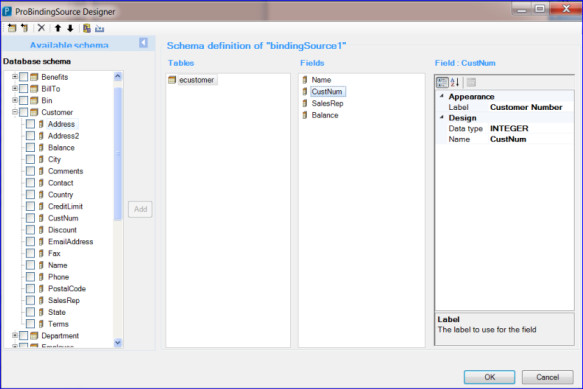
7. Select each table column and change the Name and Label properties to match the following values:
Name
Label
Name
Name
CustNum
Customer Number
SalesRep
Sales Rep
Balance
Balance
The ProBindingSource Designer now looks similar to the following illustration:
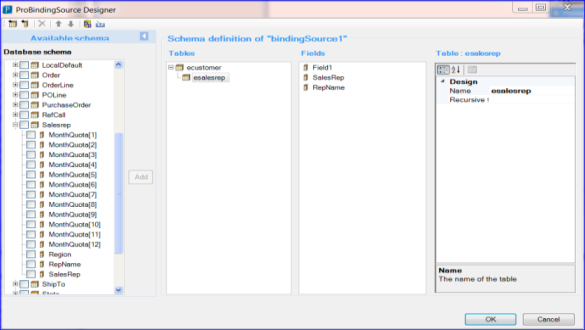
8. Select the ecustomer table in the ProBindingSource Designer dialog and add a child table by clicking the Add Table icon on the toolbar.
9. Rename the child table from Table to esalesrep.
When you add a child table, the ProBindingSource Designer dialog adds a default table column, Field1 in the Fields pane. You will remove the default tablecolumn after you import schema from the database.
10. Select esalesrep and expand the sports2000 node and the Salesrep node in the Available Schema pane.
11. Select SalesRep and RepName.
12. Click Add. The ProBindingSource Designer dialog now looks similar to the following:
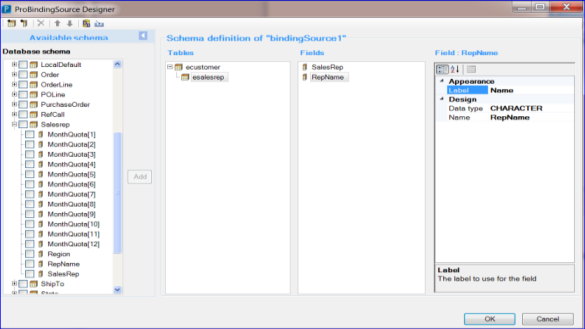
13. Select each remaining table column and change the Name, and Label properties to match the following values:
Name
Label
SalesRep
Sales Rep
RepName
Name
The ProBindingSource Designer dialog appears, as shown in the following illustration:
14. Click OK to save changes to your schema definition.

 on the toolbar

 and Move Selection Down
 icons on the toolbar.
 on the toolbar.