In this section, you will convert the SampleApp folder into a project in Progress Developer Studio for OpenEdge. The SampleApp folder contains project resources that are necessary for creating and running the sample application. For example, the SampleAppfolder contains:
Most of the files necessary to implement data access
The graphics files you will use to add images to the UI
Interface files
Other files you do not create but will use as you follow the exercises in this manual
Note: You can also follow the procedure in this section to convert the SampleAppSolution folder into an OpenEdge project. The SampleAppSolution folder contains required project resources, as well as completed versions of the sample application's forms. After you add a database resource to the SampleAppSolution project, you will be able to run the sample application (see Creating the database and Adding the database connection to the project).
To create a project for the sample application:
1. Start Progress Developer Studio for OpenEdge in the workspace that contains the SampleApp folder.
This should be the workspace where you unzipped the visualdesigner.zip file, which also contains the SampleApp and SampleAppSolution folders.
Note: If you are starting Progress Developer Studio for OpenEdge in a new workspace, you should use the Developer Studio for OpenEdge Clean startup option.
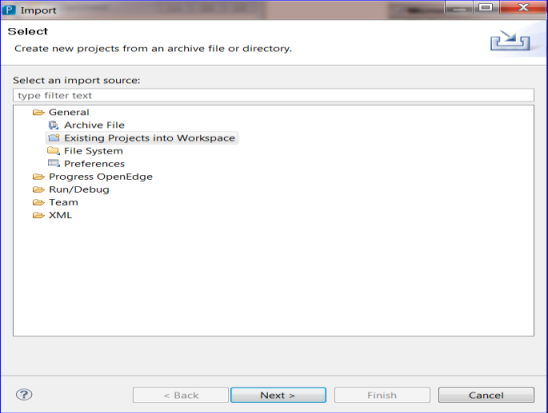
2. Select File > Import. The Import dialog appears.
3. Select General > Existing Projects into Workspace as the filter type in the Select an import source field.
The Import dialog now looks similar to the following illustration:
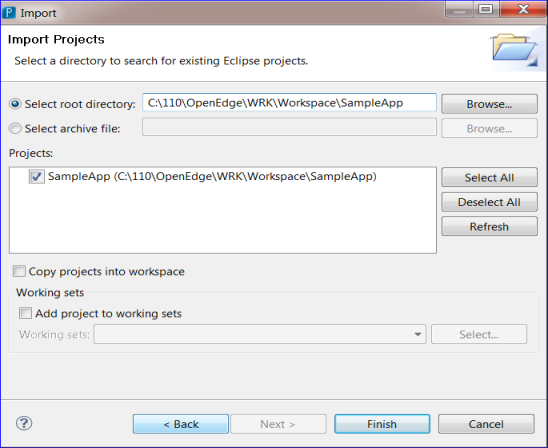
4. Click Next. The Import Project dialog appears.
5. Select the Select root directory option, and go to the SampleApp folder in your workspace directory. Your screen now looks similar to the following illustration:
6. Click Finish.
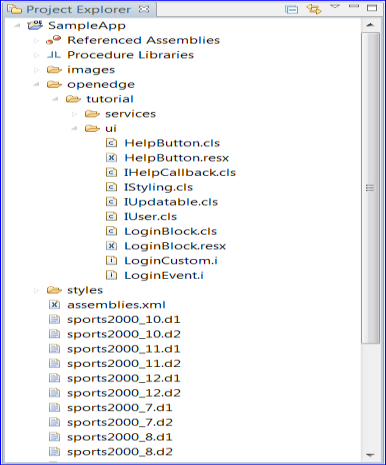
Progress Developer Studio for OpenEdge creates the SampleApp project, which includes all the files and subfolders contained in the SampleApp folder. You can view the contents of the project in the Project Explorer view as shown in the following illustration:
7. Right click on SampleApp in the Project Explorer view, and choose Progress OpenEdge > Compile.
Note: After compilation, you will see an error marker
on the start.p file, because the file refers to objects that you have not created yet. You can ignore the error marker for now. When you complete all the exercises in this manual the errors will be resolved.

 on the start.p file, because the file refers to objects that you have not created yet. You can ignore the error marker for now. When you complete all the exercises in this manual the errors will be resolved.