The Kendo UI Designer is part of Kendo UI® Builder by Progress®, an application that facilitates modernizing OpenEdge applications by creating web-based UIs. You can use the Designer to design the UIs for your application using a collection of predefined, data-driven views, or you can create custom layouts by dragging and dropping components into a user-defined Blank view. For more information about the entire Kendo UI Builder package, see Kendo UI Builder by Progress: Modernizing OpenEdge Applications.
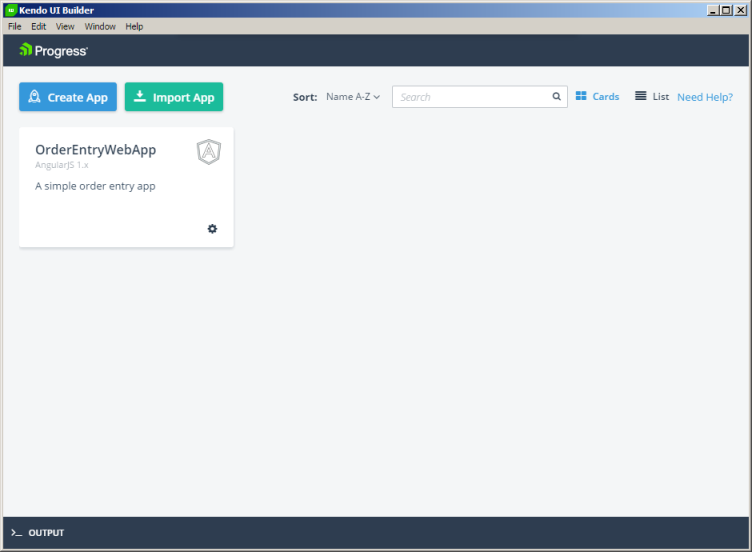
When you launch Kendo UI Designer, you are presented with a dashboard containing a menu and breadcrumbs bar, and displaying cards for any web apps you have previously created.
You will also see options to:
Create a new app (Create App). This opens the app design page for the new app. For more information, see Creating an app: first step.
Import an existing app, possibly from a prior release (Import App).
Sort apps alphabetically (Sort).
Search apps by keyword in a search box.
Display existing apps in a card (Cards) or list (List) view.
The first time you open the Designer in the current release, if you had existing apps on the Designer dashboard from a prior release, or when you import an external app, the Designer attempts to import these apps and displays a card for them on the dashboard. Each app card also prompts with one of the following app states, which determines action options that are available for the app (see the app action options below):
UpToDate: There are no issues with the app, and it is imported without the need for migration.
Migration Required: There is a difference between the app meta data version and the Kendo UI Builder meta data version, but the Designer can automatically migrate the app to the Kendo UI Builder meta data format.
Incompatible: There is a difference between the app meta data version and the Kendo UI Builder meta data version, and the Designer cannot automatically migrate the app to the Kendo UI Builder meta data format. You must either migrate the app and its meta data manually or recreate it in the Designer.
Unavailable: App meta data cannot be loaded for some other reason. You must either migrate the app manually or recreate it in the Designer.
Depending on the app state, you can duplicate, migrate, remove, or delete an existing app by clicking the gear icon in its card or list item. The following action options appear on the gear menu, based on the app state noted above:
Table 1. App action options based on app state
App state
Gear menu action options
UpToDate
Duplicate
Remove
Delete
Migration Required
Duplicate
Migrate
Remove
Delete
Incompatible
Remove
Delete
Unavailable
Remove
Each menu option works as follows:
Duplicate: Duplicates the existing app with a new app name and possibly in a different location.
Migrate: Migrates the existing app. In order to migrate an existing app, the application folder you want to migrate must contain app and meta folders from the original app.
Note: You might also need to manually move custom event function code from a prior location to the currently supported location. For example, in releases from versions 1.x, all event functions reside in application-folder\src\scripts\ModuleName-ViewName\view-factory.js. In this release, any view Init event function and Hide event function that you code must reside in application-folder\app\src\modules\module-folder\view-folder\router-event.js, for which defaults are provided, and all other event functions that you code must reside in application-folder\app\src\modules\module-folder\view-folder\controller.public.js, for which some defaults are provided, depending on the view. For more information, see Adding and editing views.
Remove: Removes the app from the Designer dashboard, but retains the app folder and files in its existing location, possibly for import at a later time.
Delete: Permanently deletes the app from the Designer, including removing its folder and files from your system.
The breadcrumbs bar (starting with the Progress logo) tracks your progress through the Designer and allows you to return to prior pages as you work on apps. You can access this dashboard at any time by clicking the Progress logo in the breadcrumbs bar.
The Output bar at the bottom displays logging information. Clicking the bar opens a console that displays log messages that are useful when you need to debug or troubleshoot a problem.