To configure a basic data source to test your connection:
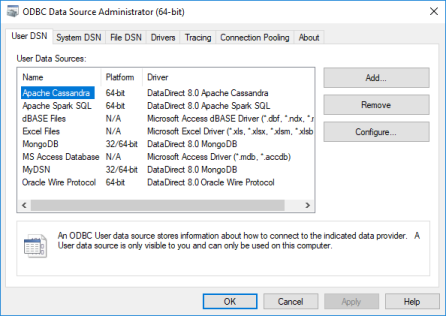
1. From the Progress DataDirect program group, start the ODBC Administrator.
2. Click either the User DSN, System DSN, or File DSN tab to display a list of data sources.
User DSN: If you installed a default DataDirect ODBC user data source as part of the installation, select the appropriate data source name and click Configure to display the driver Setup dialog box.
If you are configuring a new user data source, click Add to display a list of installed drivers. Select the Salesforce driver and click Finish to display the driver Setup dialog box.
System DSN: To configure a new system data source, click Add to display a list of installed drivers. Select the Salesforce driver and click Finish to display the driver Setup dialog box.
File DSN: To configure a new file data source, click Add to display a list of installed drivers. Select the Salesforce driver and click Advanced to specify attributes; otherwise, click Next to proceed. Specify a name for the data source and click Next. Verify the data source information; then, click Finish to display the driver Setup dialog box.
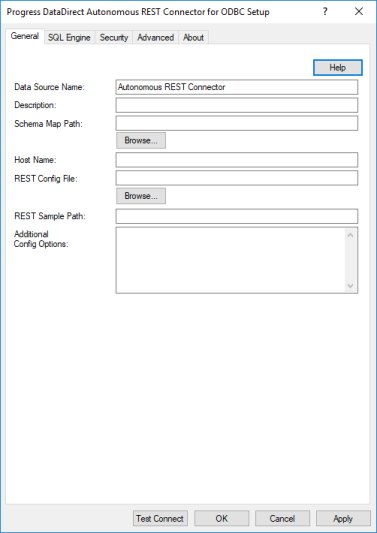
3. The General tab of the Setup dialog box appears by default.
On the General tab, provide the following information:
Data Source Name: Type a string that identifies this data source configuration, such as Accounting.
Description: Type an optional long description of a data source name, such as My Accounting Database.
4. Provide a value for one of the following options:
For sessions using an input REST file (sessions with multiple endpoints, POST requests, paging, or custom headers):
REST Config File: Type the name and location of the input REST file that contains the list of endpoints to sample and paging configuration information. For example, C:/path/to/myrest.rest.
For sessions that issue GET requests to a single endpoint:
REST Sample Path: Type the endpoint that the driver connects to and samples. For example, http://example.com/countries/.
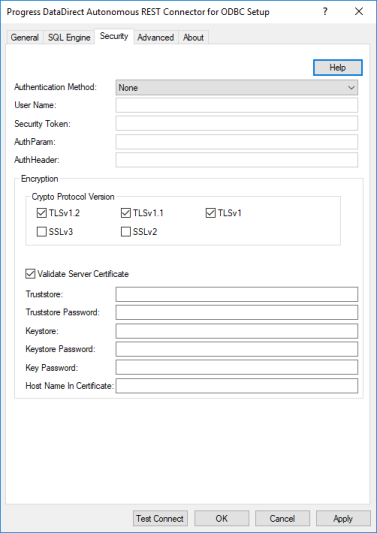
5. Click the Security tab.
From the Authentication Method drop-down, select the method used by your REST service:
None: Select this method if your service does not require authentication; then, skip to Step 9.
Basic: Select this method if your service authenticates using user IDs, passwords, and HTTP headers; then, proceed to the next step.
HttpHeader: Select this method if your service authenticates using security tokens passed via HTTP headers; then, proceed to Step 7.
UrlParameter: Select this method if your service authenticates using security tokens passed via URLs; then, proceed to Step 8.
6. Provide values for the following options to configure basic authentication:
User Name: Enter your logon ID for the REST service.
AuthHeader: Enter the name of the HTTP header used for authentication. The default is Authorization.
7. Provide values for the following options to configure HTTP Header based authentication:
Security Token: Enter the security token required to make a connection to your endpoint. For example, XaBARTsLZReM.
AuthHeader: Enter the name of the HTTP header used for authentication. The default is Authorization.
8. Provide values for the following options to configure URL parameter based authentication:
AuthParam: Enter the name of the URL parameter used to pass the security token. For example, apikey.
SecurityToken: Enter the security token required to make a connection to your endpoint. For example, XaBARTsLZReM.
9. To save your settings, click Apply; then, OK.
You are now ready to test the connection.
Note: Testing your connection with the Test Connect button only partially confirms that the driver is properly configured. Since REST services lack traditional database structures, you will need to retrieve data from your endpoint to confirm that you have successfully connected to your data. The Example application described in "Testing the Connection" allows you to quickly fetch data from your endpoint, thereby testing your connection.