You must have the iODBC Administrator installed and set up on your machine. For information on downloading the iODBC Administrator, refer to http://www.iodbc.org/.
On macOS platforms, data sources are stored in the odbc.ini file. The iODBC Administrator allows you to create and modify these data sources using a graphical user interface, as described in this section.
To configure a data source:
1. Open iODBC Administrator.app.
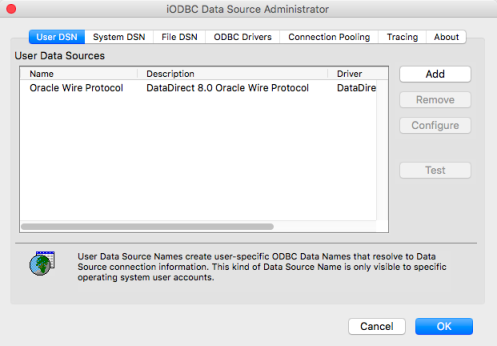
The iODBC Data Source Administrator dialog box appears.
2. Click either the User DSN, System DSN, or File DSN tab to display a list of data sources.
User DSN: If you are configuring an existing user data source, select the appropriate data source name and click Configure to display the Setup dialog box.
If you are configuring a new user data source, click Add to display a list of installed drivers. Select the appropriate driver and click Finish to display the Setup dialog box.
System DSN: If you are configuring an existing system data source, select the data source name and click Configure to display the Setup dialog box.
If you are configuring a new system data source, click Add to display a list of installed drivers. Select the driver and click Finish to display the Setup dialog box.
File DSN: If you are configuring an existing file data source, select the appropriate data source file and click Configure to display the Setup dialog box.
To configure a new file data source, click Add to display a list of installed drivers. Select the appropriate driver and click Advanced to specify attributes; otherwise, click Next to proceed. Specify a name for the data source and click Next. Verify the data source information; then, click Finish to display the driver Setup dialog box.
If you want to set a default directory for File DSNs, select the directory from the Directories list; then, click Set Dir. The next time that you open the Administrator, it displays data source files from this directory.
See "Getting Started" for an explanation of different types of data sources.
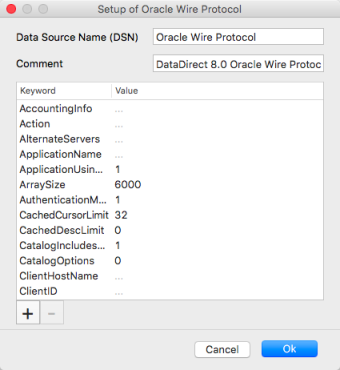
3. The data source Setup dialog box appears. For existing data sources, the dialog is prepopulated with a list of the connection option attribute-value pairs currently stored in the odbc.ini file. Configure the data source by adding and/or editing connection option attributes and values:
To add a new connection option attribute, click the Add button
. Then, in the new row, type the attribute name in the Keyword field and the desired valid value in the Value field.
To configure an existing option, edit the value field that corresponds to the connection option attribute you want to modify.
For descriptions of connection option attributes and valid values, see "Connection Option Descriptions."
4. Click OK to save your changes and close the Setup dialog.
5. Optionally, test your connection. On the iODBC Data Source Administrator dialog, highlight your data source from the list; then, click Test.
6. A logon dialog box appears. Enter your username and password; then, click Ok. Note that the information you enter in the logon dialog box during a test connect is not saved.
7. Click OK. When you click OK, the values you have specified become the defaults when you connect to the data source. You can change these defaults by using this procedure to reconfigure your data source. You can also override these defaults by connecting to the data source using a connection string with alternate values.

 Configure the data source by adding and/or editing connection option attributes and values:
 . Then, in the new row, type the attribute name in the Keyword field and the desired valid value in the Value field.