Running the Server and Web Console installer wizard
The Server installer will install or update Servers and Web Console to 5.6.x.
Installing or updating Server and Web Console 5.6.x
You can install Corticon Servers and the Web Console on a machine that does not already have them installed. If you are upgrading from 5.3, 5.4, or 5.5, you can install 5.6 as a separate installed software version on the same machine. You must manage any port overloads that might result from running both versions.
Note: An installed version of Corticon Server 5.2 or earlier on the target machine must be uninstalled, then Corticon Server 5.6 installed. Consult with Progress Corticon Support or your Progress representative to consider your migration strategies for existing assets before you take action.
Installation procedure
If you have already installed either of the 5.6 Servers or the Web Console, the installer will allow you to install components not previously installed, as well as update all installed components to the latest Service Pack.
To create or update an installation of Corticon Servers (Java and .NET) and Web Console 5.6.1:
1. On the target machine, access the Corticon 5.6.x installers you downloaded.
2. To open the Progress Corticon Server Setup Wizard:
For Windows, double click on: PROGRESS_CORTICON_5.6.1_SERVER_WIN_64.exe
For Linux, run: PROGRESS_CORTICON_5.6.1_SERVER_LNX_64.bin
The installer opens in the installer wizard. The first installer panel opens with information about the installer.
3. Click Next to continue.
The License Agreement panel opens.
4. After you have read, understood, and agreed to the terms of the End User License Agreement, choose I accept the terms of the license agreement, and then click Next.
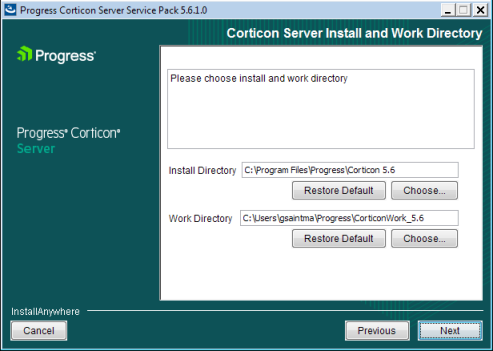
The Choose Install Folder panel opens.
5. The default installation directories are shown. To specify preferred directories on each line, either enter the explicit path, or click Choose to browse to each preferred directory.
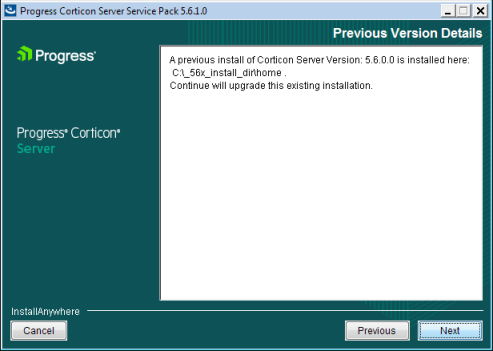
6. If you see the upgrade panel instead, Corticon Server components are already installed. You can add previously unselected components but you cannot change the install location or uninstall existing components.
7. Click Next.
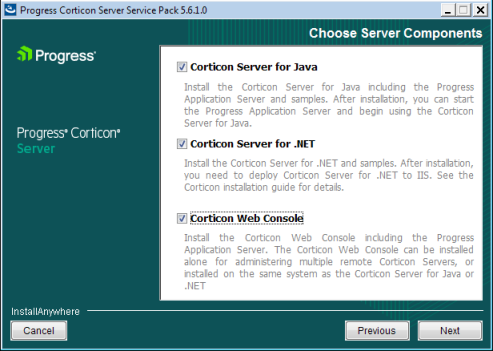
The Choose Server Components panel opens.
8. Choose the one or more components you want to install at this time. Any components already installed are chosen and greyed out.
Note: The Linux installer does not enable a Corticon Server for .NET installation.
Click Next.
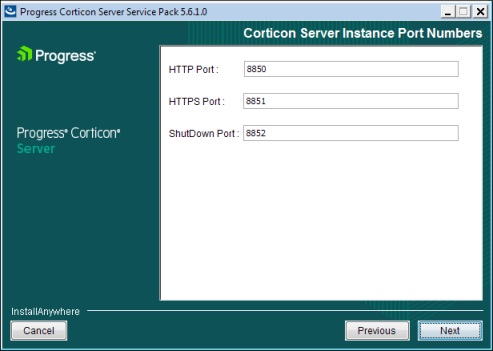
If you selected the Java Server or Web Console, the Corticon Port Numbers panel opens.
9. If any of the preferred ports conflict with existing applications, you can change them at this time to an integer value from 1024 to 49151. Be aware that the documentation references these ports as though the default values, as shown, were accepted. Consult with your system administrator to identify alternate ports you might use, or to reset the ports on the conflicting applications.
Enter your preferred port numbers, and then click Next.
The Pre-Installation Summary page opens.
10. Verify your selections in the Pre-Installation Summary panel. Nothing has happened yet so you can click Previous to go back to a panel to make changes, or click Cancel to quit this installation procedure.
11. Click Install to continue.
The installation status window opens.
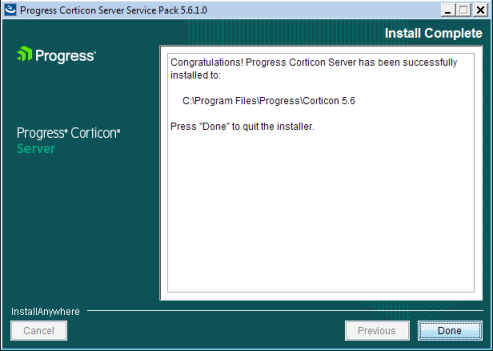
When done, the Install Complete panel opens.
12. Choose Done to complete the Corticon Server / Web Console installation and close the installer.
The installation and update of Corticon Servers and Web Console 5.6.x is complete.
Note: Using an LDAP store for Web Console authentication - You can set up Corticon Web Console to authenticate users using an LDAP server. See the topic Using LDAP for Web Console authentication