Step 1: Starting the Database Administration Console in OpenEdge Management or OpenEdge Explorer
Once you complete the OpenEdge installation, you can start the Database Administration Console in OpenEdge Management or OpenEdge Explorer. Note that this guide refers to two consoles:
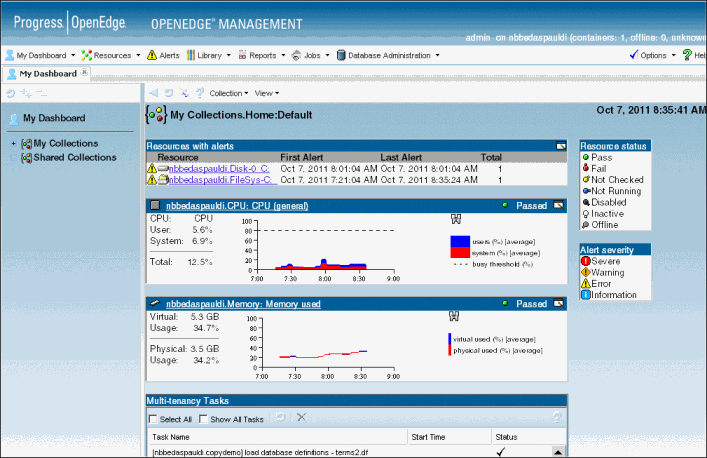
The OpenEdge Management and OpenEdge Explorer management console, which comprises functionality for following areas, as indicated by the tabs in the menu bar: My Dashboard, Resources, Alerts, Library, Reports, Jobs, Database Administration, Options, and Help:
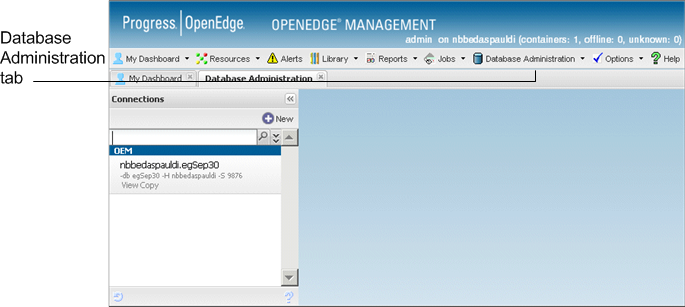
The Database Administration Console, accessible from within the management console by the Database Administration tab:
The management console and the Database Administration Console look the same in OpenEdge Explorer as they do in OpenEdge Management. The only difference you find when using OpenEdge Explorer is that any OpenEdge Management-only functionality is disabled in the management console when you do not have the required OpenEdge Management license.
OpenEdge Management/OpenEdge Explorer runs in a Web browser, making it accessible in Windows and on supported UNIX platforms. It is recommended that you use a recent version of a common Web browser to take full advantage of the functionality.
To start the Database Administration Console in OpenEdge Management or OpenEdge Explorer in a browser and then log in:
1. Choose one:
Open a Web browser, and enter the URL http://host:port in the address or location field. The host is the name of the machine where OpenEdge Management/OpenEdge Explorer is installed; the default port is 9090.
From the Windows Desktop on your local host, select Start > Programs (or All Programs) > Progress > OpenEdge > Database Administration Console> to start OpenEdge Management/OpenEdge Explorer.
If you have only OpenEdge Explorer installed, select Start > Programs (or All Programs) > Progress > OpenEdge > OpenEdge Explorer.
The logon window appears.
2. Provide the user name and password. The first time you log on to OpenEdge Management or OpenEdge Explorer, you must use the default user name, which is admin, and the default password, which is admin.
3. Do the following:
a. Complete the OpenEdge Management Configuration page to make your initial configuration choices.
This includes resetting your login password, choosing whether to have OpenEdge Management or OpenEdge Explorer start automatically, choosing a location for the OpenEdge Management Trend Database, specifying the Web server port, choosing the e-mail server and default email recipient, and establishing SNMP Adapter settings.
Click Submit.
For details, see:
Choosing initial configuration options in OpenEdge Management and OpenEdge Explorer: Getting Started
b. Complete the Getting Started page (OpenEdge Management only).
This includes adding one or more external databases and defining monitoring and trending options for file systems and disks.
Click Submit.
For details, see:
Setting up the Getting Started page for OpenEdge Management in OpenEdge Management and OpenEdge Explorer: Getting Started
4. Click OK to restart the Web server, and then log in with your user name and new password.