The Control Toolbox contains a list of the controls that you use to develop a user interface. These controls are organized into three groups:
Microsoft — The Microsoft® .NET™ UI Controls that are the basic user interface controls that install with Progress Developer Studio for OpenEdge
OpenEdge — OpenEdge-specific controls for binding to OpenEdge data sources, and for embedding OpenEdge windows that install with Progress Developer Studio for OpenEdge
OpenEdge Ultra — Advanced .NET controls based on Infragistics® NetAdvantage
Note: OpenEdge Ultra requires the installation of OpenEdge® Ultra Controls for .NET, which is an optional product. OpenEdge Ultra is required if you want to complete the exercises in this manual.
Telerik UI for WinForms — Telerik UI for WinForms controls that you can use to build your business applications. If you need a different version of Telerik, you can download it from the Telerik web site.
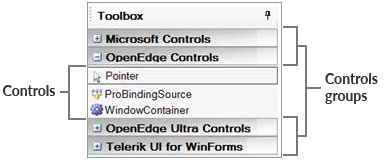
When you expand a group, as shown in the following figure, you can select a control, and then drag and drop it on a form in the Design Canvas.
Figure 3. The Control Toolbox
You can create custom controls by combining existing controls or by inheriting from an existing control class. You can also add additional controls that you obtain from third-party control vendors. In addition, you can organize controls into groups that you define, for example the My Controls group shown in the above figure.