Now you are ready to move to the Glossary tab where you create a glossary for the target language.
To add a glossary to a project:
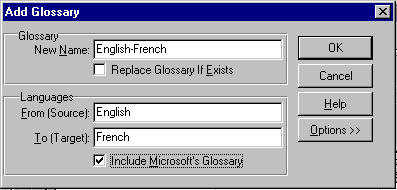
1. In the Glossary tab, choose Add. The Add Glossary dialog box opens:
2. Type English-French in the New Name field.
3. Type English as the From (Source) language andFrench as the To (Target) language.
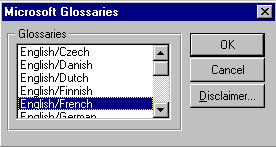
4. Check the Include Microsoft’s Glossary box. The Microsoft Glossaries dialog box appears:
5. Select English/French and choose OK.
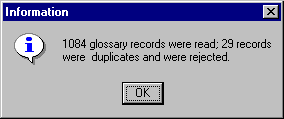
6. Choose OK in the Add Glossary dialog box. An Information box appears after the glossary is loaded:
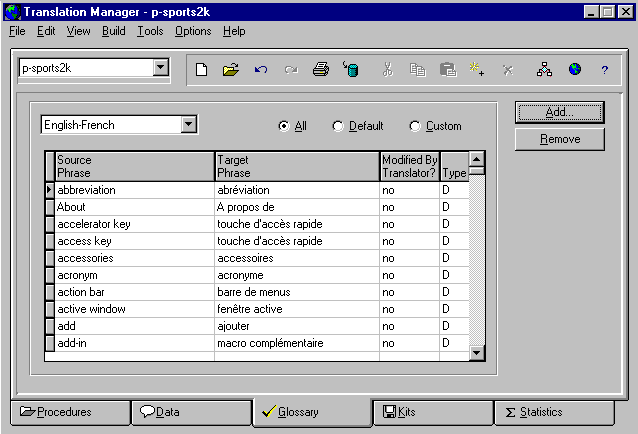
7. Choose OK. The glossary appears in the Glossary tab:
Caution: The Remove button removes the entire glossary.
You have defined the glossary that the translator will use. When there are many translation projects, it is important that translators use the same glossary to be sure that they translate phrases consistently.