If you do not have glossary terms to add, you must still create an empty glossary that can accept the translator’s entries.
To add a glossary that contains suggested pairings of words for the source and target languages to the current project:
1. Choose the Glossary tab to open the Glossaries tab folder.
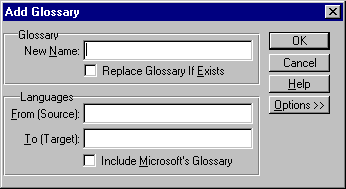
2. Choose Add. The Add Glossary dialog box appears:
3. Type a name for the glossary in the New Name field. You should use a name that indicates the source and target languages. For example, if you are creating a glossary containing English source phrases and French target phrases, call the glossary “English-French.”
4. Type the name of the source and target languages.
5. Specify whether you want to populate the new glossary with terms from a Microsoft Technical Glossary.
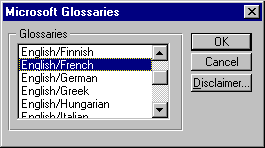
If you activate the Include Microsoft Glossary toggle box, a dialog box appears from which you can select a specific Microsoft Technical Glossary:
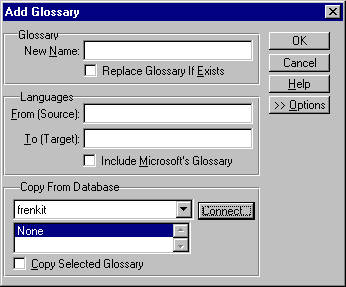
6. Choose Options to expand the Add Glossary dialog box and specify whether to create a copy of a glossary from another project database. You must connect to the project database from which you want to copy the glossary:
7. Choose OK to add the glossary to the current project. The Translation Manager displays a list of the source phrases and target phrases in the Glossaries folder.
You can add source and target text phrases manually into the Glossary tab folder. However, the Translation Manager does not accept text phrases that begin with a question mark (?).