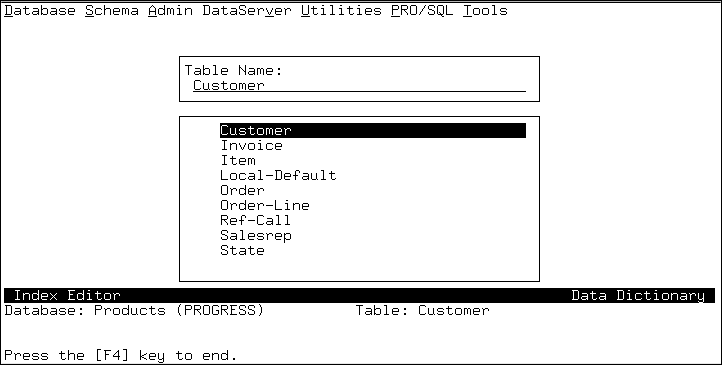
1. Choose SchemaIndex Editor. The Index Editor alphabetically lists all the tables defined for your database, as shown:
2. Select a table.
3. Choose Add.
4. Enter a name for the index. Specify whether the index is unique or non-unique, active or inactive, and a word index or a standard index.
5. Press RETURN.
6. Select an area in which to store the new index. (Scroll down to see available options.)
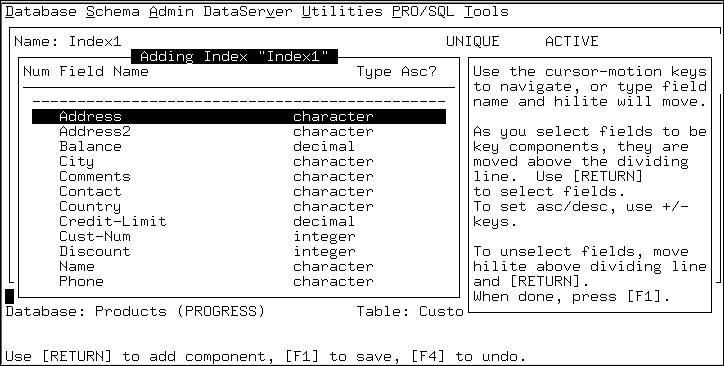
7. Press GO. The Adding Index window appears, listing the field names you can add to the new index:
8. Highlight the desired field and press RETURN. The Index Editor prompts you to specify whether you want this index component to be ascending or descending.
9. Specify Yes for ascending or No for descending. The Index Editor moves the selected field above the dividing line of the window. To change the sort order of a field above the dividing bar, highlight the field. Then press the plus sign (+) for ascending or the minus sign (-) for descending.
10. Select the next field. You can specify up to 16 fields to define an index.
11. When you are done choosing fields, press GO. If the index has a character field as the last index component, the Index Editor prompts you to specify whether you want to use the Abbreviate option.
If you choose to use the Abbreviate option, the Index Editor displays the following Question:
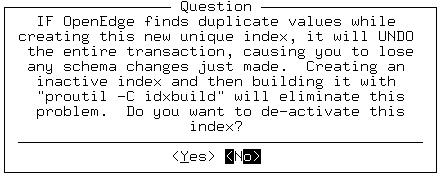
12. Specify whether to deactivate the index. The Index Editor main window reappears and adds the new index to the list.
13. Choose Exit. The Data Dictionary displays an alert box asking if you want to apply or undo the changes to the database, or if you want to make other changes.
14. Choose Apply Changes. The Data Dictionary main window appears.