Testing the Driver Manager Connection
You can use DataDirect Test™ to verify your connection.
To test the Driver Manager connection, follow these steps:
1. Navigate to the installation directory. The default location is:
Windows systems:
Program Files\Progress\DataDirect\JDBC_60\testforjdbc
UNIX and Linux systems:
/opt/Progress/DataDirect/JDBC_60/testforjdbc
For UNIX/Linux, if you do not have access to /opt , your home directory will be used in its place.
2. From the testforjdbc folder, run the platform-specific tool:
testforjdbc.bat (on Windows systems)
testforjdbc.sh (on UNIX and Linux systems)
The Test for JDBC Tool window appears:
3. Click Press Here to Continue .
The main dialog appears:
4. From the menu bar, select Connection > Connect to DB .
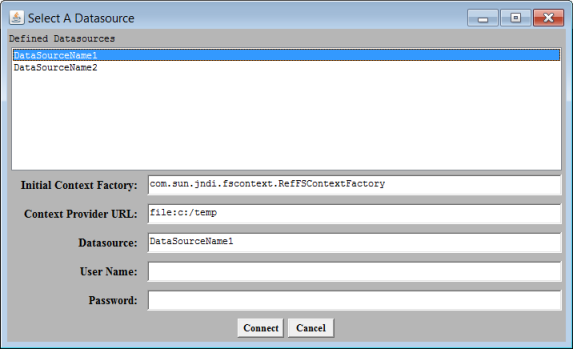
The Select A Database dialog appears:
5. Select the appropriate database template from the Defined Databases field.
6. In the Database field, specify the correct ServerName and PortNumber for your Apache Spark SQL data source.
For example:
jdbc:datadirect:sparksql://Server3:10000;databaseName=Test
7. If required, enter your user name and password in the fields provided.
8. Click Connect .
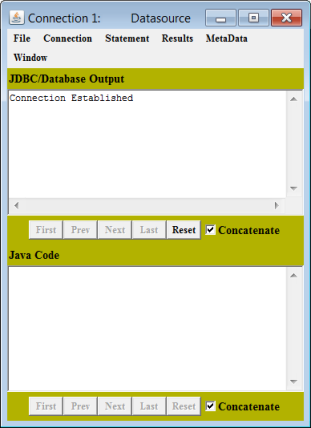
If the connection is successful, the JDBC/Database Output window reports that a connection has been established. (If a connection is not established, the window reports an error.)