skip to main content
Getting Started : Connecting Using the JDBC Driver Manager : Testing the Connection
  

Try DataDirect Drivers Now

Testing the Connection

You can also use DataDirect Test™ to establish and test a DriverManager connection. The screen shots in this section were taken on a Windows system.
Take the following steps to establish a connection.
1. Navigate to the installation directory. The default location is:
*Windows systems: Program Files\Progress\DataDirect\JDBC_60\testforjdbc
*UNIX and Linux systems: /opt/Progress/DataDirect/JDBC_60/testforjdbc 
For UNIX/Linux, if you do not have access to /opt, your home directory will be used in its place.
2. From the testforjdbc folder, run the platform-specific tool:
*testforjdbc.bat (on Windows systems)
*testforjdbc.sh (on UNIX and Linux systems)
The Test for JDBC Tool window appears:
Test for JDBC Tool landing page
3. Click Press Here to Continue.
The main dialog appears:
Test for JDBC Tool window
4. From the menu bar, select Connection > Connect to DB.
The Select A Database dialog appears:
The Select a Database dialog box
5. Select the appropriate database template from the Defined Databases field.
6. In the Database field, specify all required connection properties.
For example:
jdbc:datadirect:mongodb://MyServer:27017;DatabaseName=Test;
SchemaMap=MyUserProfile\AppData\Local\Progress\DataDirect\MongoDB_Schema\MyServer.config
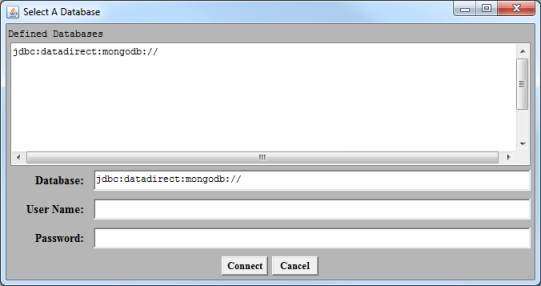
7. If you did not specify your user name and password in the connection URL, enter this information in the corresponding fields.
8. Click Connect.
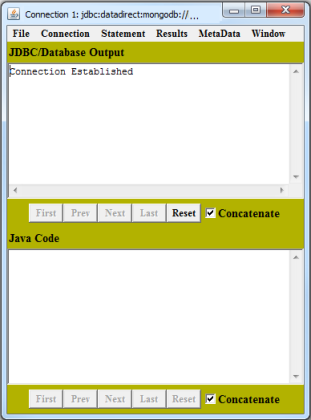
If the connection information is entered correctly, the JDBC/Database Output window reports that a connection has been established. (If a connection is not established, the window reports an error.)
Connection window
For more information about using DataDirect Test, see DataDirect Test.