2. Open the Ruleflow you have deployed as a Decision Service in a CDD. If you are using the Tutorial example, this is tutorial_example.erf.
3. Create a new Ruletest by following the procedure outlined in Option 1 above. For Test Subject, you can choose either your local or remote tutorial_example.erf.
4. Create an Input test tree manually as in Option 1 above, or use menubar option Ruletest>Testsheet>Data>Input>Generate Data Tree, which produces the structure of a request message in the Input pane. One Cargo entity should appear in the Input pane, as shown below:
Figure 382. A New Test
5. Enter data into the Input Testsheet as you did when testing the Ruleflow in the Corticon Studio Tutorial: Basic Rule Modeling. Your Input Testsheet will now look similar to the following:
Figure 383. Test with Data
6. Use Corticon Studio's menubar option Ruletest>Testsheet>Data>Input>Export Request XML to export this Input pane as an XML document. We will use this exported XML document as the body or payload of our request message. Give the export file a name and remember where you save it. We will assign a filename of sample.xml for our use case.
7. Open sample.xml in any text editor. It should look very similar to the following figure:
Figure 384. Sample XML File Exported from a Studio Test
8. Modify sample.xml by deleting the <?XML version=1.0 encoding=UTF-8?> tag from the very top (this will be added automatically by the bundled sample code we will use to send this as a request message to the Decision Service). This tag is shown above, enclosed in an orange box.
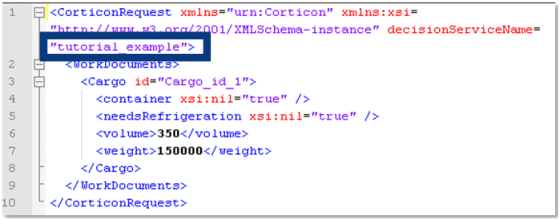
9. Change the decisionServiceName attribute value in the CorticonRequest element from InsertDecisionServiceName to the service name of the Decision Service as it was defined in your deployed .cdd file. In our example, this name is tutorial_example. This piece is shown in the figures above and below (before and after the changes) enclosed in a blue box. Your sample.xml file should now look like this:
Figure 385. Sample XML File with Changes Made
10. Save your changes to the XML file and exit your text editor.