Often decisions are based on statistical data in tables that are actuarial or real-world data that cannot be derived through a formula. Insurance underwriting, manufacturing tooling, life sciences, and census data have examples of data that is key to decision making yet revised only at regular time intervals.
When used in Corticon, a Rulesheet that provides such data is very useful but could require hours of data entry to create what might be thousands of rules. This feature makes that task fast, easy, and accurate.
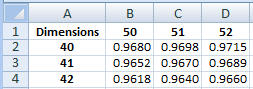
Consider the following excerpt of the sample Excel worksheet with data as an example for life insurance underwriting. (In a Studio installation, the file is located at [CORTICON_WORK_DIR]\Samples\ImportExcel\SampleDimensionalData.xslx.)
Column A contains headers that identify the applicant's age, and row 1 contains headers that identify the beneficiary's age. The cells are the policy factor that adjusts the policy premium:
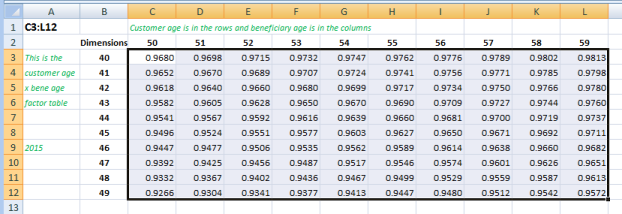
When this two-dimensional information is imported into a Corticon Rulesheet, each of the two dimensions and the data area are assigned to Vocabulary attributes within an entity. Then, each of the two dimensions defines a Condition and the data point specifies an Action, as shown:
When the data range expands, there could be thousands of rules in the Rulesheet that were all created by one import action, and later updated by performing the same import from the revised worksheet.
Preparing Excel sheets
In order to achieve successful import of a dimensional Excel worksheet into Corticon, the sheet must have a specific layout. The sample sheet Two Dimensions is modified and offset here to present a few concepts:
The data range, C3:L12, has no empty cells, and each cell has the same data type.
Column B, to the left of the start point, is assumed to have the values for each row in the vertical dimension.
Row 2, above the start point, is assumed to have the values for each column in the horizontal dimension.
The dimension values have no empty cells, no duplicate values, and each cell has the same data type.
The dimension and data cells, B2:L12, are the only cells read by the import feature. Data in any other cells have no impact on the import. Conversely, setting a range that includes blank cells, such as C3:M13, will not import successfully.
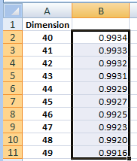
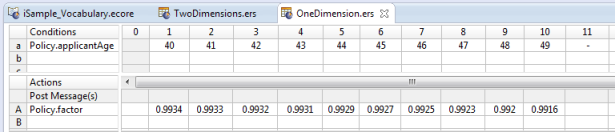
A one dimensional table follows similar rules. The only consideration is to specify only the appropriate dimension,, as in the sample sheet One Dimension that uses the vertical attribute:
Note: Decimal precision - Some decimal values might seem imprecise between the Excel workbook value and their corresponding Rulesheet action value. A good practice is to set the Excel workbook precision before initiating an import into Corticon. With the Workbook open and the data formatted to the preferred decimal precision, click the Microsoft Office Button, click Excel Options, and then click Advanced category. In the When calculating this workbook section, select the workbook that you want, click to select the Set precision as displayed check box, and then click OK. You are alerted that you are losing precision while in fact you are ensuring that the value displayed is the value that is imported into Corticon. Save and close the Excel workbook, and then start the import process.
Importing the Excel sheet into a Rulesheet format
Once your Excel sheet has been prepared, you can import it into a Rulesheet.
To import an Excel sheet into Corticon Studio:
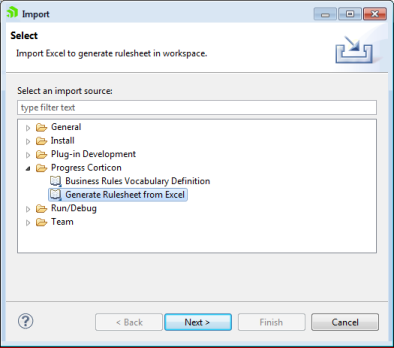
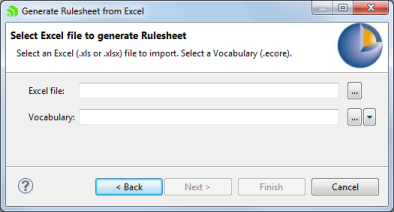
1. Select the menu command File > Import. You could instead navigate to the Vocabulary of the project where the Rulesheet will be created to right-click on it, and then select Import.
Click Next. The Generate Rulesheet from Excel dialog box opens:
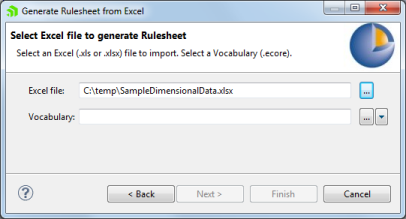
2. Click the Excel file search button, and then locate and open the Excel file. For this example, select SampleDimensionalData.xlsx.
3. Click the Vocabulary search button, and then locate and open the Vocabulary file. As illustrated, you can choose to find it in the workspace or in the file system. (If you launched the Import function with the Vocabulary file selected, the Vocabulary file is pre-selected when the dialog opens.)
4. To follow the example, choose the Life Insurance sample's Vocabulary:
Click OK to close the selection dialog, and then click Finish to enter the import parameters.
Note: If you are following these steps hands on in Studio, you need to add three attributes to the Life Insurance sample's Vocabulary Policy entity, one named applicantAge with the datatype human_age, one named beneficiaryAge with the datatype human_age, and another named factor with the datatype decimal.
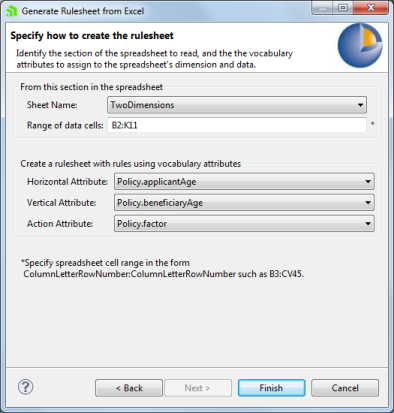
5. On the Specify how to create the Rulesheet panel, choose or enter the parameters as shown:
Click Finish. The import process creates a Rulesheet in the project with the name of the Excel sheet.
6. Review the results in the Studio:
The Rulesheet has 100 columns, one for each rule from the 10x10 matrix that was imported.
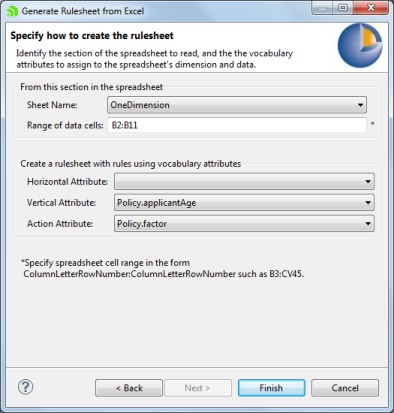
7. To follow up with an import of the one dimensional sheet, repeat steps 1 through 4, and then choose or enter the parameters as shown:
Notice that the Horizontal attribute was left blank and the range specifies only one column.
8. Review the results in the Studio:
The Rulesheet has 10 columns, as shown, one for each rule from the 10x1 matrix that was imported.
Updating an imported sheet
When you run these import tasks again, the existing Rulesheet of the same name in the project is replaced.